
Cold Weather Gear Layering
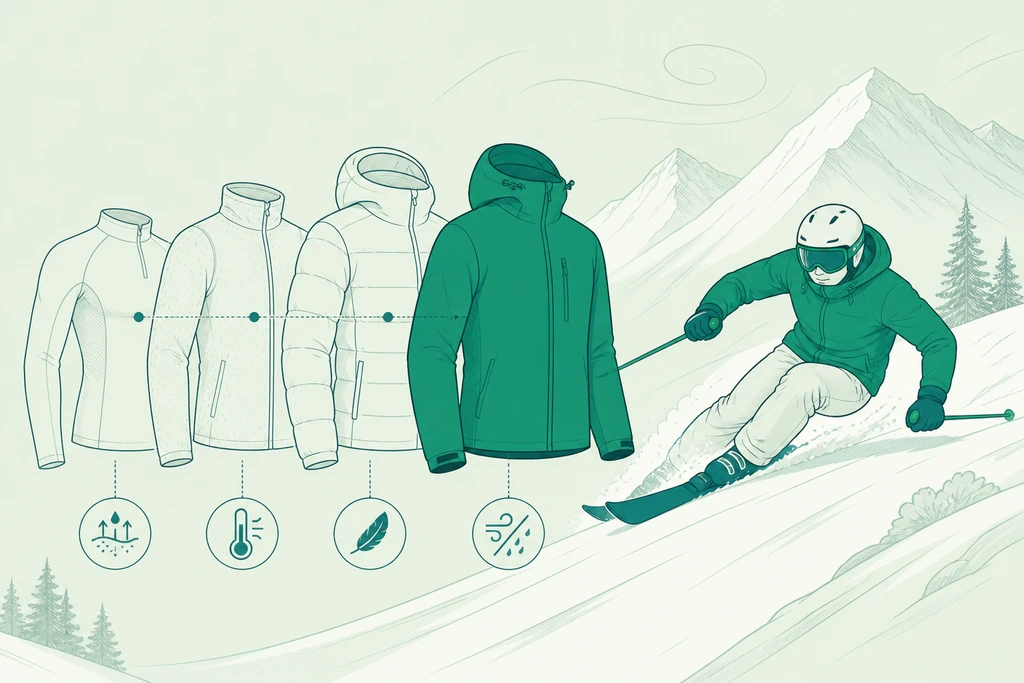
When descending slopes at high speeds, severe wind chill strips body heat far faster than static cold. Effective cold weather gear requires a coordinated system of specialized textiles to counter convective cooling without trapping moisture. This guide breaks down the mechanics of winter layering, membrane specifications, and proper stack assembly to ensure reliable thermal protection during fast-paced alpine activities.
Cold Weather Gear FAQ
How does high speed alter felt temperature during winter sports?
What airflow permeability should you look for in alpine shells?
Why is a three-layer system essential for winter activities?
When should you adjust your layers to prevent dangerous overheating?
Why do extremities lose body heat faster than the core?
Mastering Cold Weather Gear Layering
-
Evaluate Wind Chill Dynamics
Calculate how high-speed movement strips away your warm boundary layer. High velocity drops felt temperatures significantly faster than static cold.
-
Select Moisture Wicking Base
Choose synthetic or merino wool base layers to pull sweat from the skin. Staying dry prevents rapid convective cooling when resting.
-
Add Thermal Insulation Layer
Trap body heat using fleece or lightweight down in the middle layer. This traps warmed air without adding bulk that restricts movement.
-
Inspect Alpine Shell Permeability
Verify membrane specs to ensure the outer shell blocks wind effectively. Look for an air permeability rating between 0 and 5 CFM.
-
Protect Vulnerable Extremities
Cover hands, feet, and the head where blood vessels constrict fastest. Quality gloves and balaclavas prevent early heat loss during descent.
-
Regulate Temperature to Prevent Sweating
Open pit zips or adjust layers before you overheat on strenuous climbs. Moisture buildup inside your cold weather gear destroys insulation value.
-
Test Assembly at Speed
Run a test at your target velocity to check for drafts and gaps. Ensure zippers, cuffs, and collars seal completely against rushing air.
Why wind chill rewrites the rules
A downhill skier at 70 km/h creates an apparent wind that can push felt temperature down by 15–20 °C within a single run. Heat leaves the body through convection, and the faster you move, the thinner the still-air boundary around your skin becomes. That is why a jacket that feels fine while standing at −5 °C turns marginal at the same −5 °C once speed is added. Cold weather gear for high-speed sports is built around wind resistance first and insulation second. Read membrane specs before logos: 0–5 CFM air permeability is the useful window for alpine shells; above 10 CFM the fabric breathes well but leaks warmth quickly, and a fully airtight film traps sweat that chills you on the lift. Construction carries equal weight — taped seams, a hood that clears a helmet, cuffs that seal without locking the shoulder. Racers often lose more heat through a gap at the waist than through a thinner fabric on the back.
Three layers, one system
Layering works only when each layer has a job and none of them duplicates another. The base layer sits against skin and moves moisture: merino at 150–200 gsm handles odour and damp well, while polyester knits dry faster and cost less. Nothing in this position should be cotton. The mid layer stores heat and must stay lofted when wet — grid fleece at 100–260 gsm for active skiing, synthetic loft of 60–80 gsm when the mercury drops below −15 °C. The shell blocks wind and snow; a 20,000 mm / 20,000 g rating is more than most resort skiers need, but the pit zips and a helmet-compatible hood matter more than the headline number. Fit carries real weight: a mid layer compressed by a tight shell loses roughly half its insulating value, and an oversized shell flaps, pumping warm air out at every turn. Try the full stack on before you buy, and swing your arms to test mobility. Just as the-evolution-of-track-designs-and transformed modern racing, understanding thermal physics changes how athletes approach winter gear integration.
Assemble the stack in order
Order matters more than brand names. Start with the forecast, not the closet: check base temperature, wind speed at the summit, and the number of exposed lift minutes, then add roughly one insulation step for every 10 km/h of wind. Next, pull on the base layer before you leave the house — a warm body in a cold car beats any pre-ride warm-up. Third, add the mid layer and zip the shell only at the top of the lift; walking to the gondola in a fully closed jacket is how riders soak their kit before the first turn. Then deal with the edges, because cuffs, collar and hem decide whether the whole stack works:
- Close the wrist cuffs over the glove liners.
- Tuck the inner collar under the helmet liner.
- Cinching the hem stops warm air escaping upward.
Finally, test the assembly at the car: bend, squat, reach overhead. If cold weather gear restricts any of those three, adjust it there rather than mid-slope.
Extremities give up heat first
Vasoconstriction shuts down blood flow to fingers, toes and the face long before the torso feels cold. That is physiology, not weakness, and it is why a skier with a warm core can still lose a run to numb hands. Dedicated cold weather gear for hands, head and feet works better than extra thickness elsewhere: mittens keep four fingers sharing one heated space and run roughly 5–9 °C warmer inside than gloves of the same insulation; three-finger hybrids trade a little warmth for pole grip. Add thin merino liners under shell gloves for the lift ride and pull them off for the descent. On the head, a balaclava under the helmet covers the neck gap that a collar leaves open, and goggles with a double lens and sealed frame stop the tearing that wind at 60 km/h provokes. Boots need room: a tight toe box cuts circulation, so size up half a step and use boot covers or heated insoles rather than a second sock.
Where cold weather gear fails
Most failures on the mountain trace back to a material chosen for the wrong job rather than to the cold itself. Cotton is the classic offender: it holds water against the skin and loses essentially all insulating value, so a cotton T-shirt under a shell turns into a cooling pack within twenty minutes of hard skiing. Down behaves similarly when soaked — 650-fill loses loft fast without a hydrophobic treatment, and even treated down needs a dry shell around it. Worn DWR is a subtler problem: water stops beading, the face fabric wets out, and breathability drops by half, which feels like a broken membrane. Delamination at the shoulders and hood usually follows two or three seasons of pack straps and machine washing with softener. Cold weather gear that has seen 100+ days of use deserves a re-proofing wash before it is blamed for a bad day on the slopes.
Essential Cold Weather Gear Requirements
| Layer Function | Material Spec | Permeability Limit | Operational Rule |
|---|---|---|---|
| Base layer moisture management | Synthetic or merino wool | High breathability rating | Keep skin completely dry |
| Mid layer thermal retention | Fleece or lightweight down | Moderate air trapping | Trap heat without bulk |
| Outer shell wind resistance | High-density technical membrane | Zero to five CFM | Block high-speed wind chill |
| Extremities thermal protection | Insulated gloves and socks | Windproof outer barrier | Prevent rapid heat loss |
Overheating undermines every layer
Sweat is the most common reason a well-planned system fails, and it is entirely self-inflicted. A hard 10-minute run generates several hundred millilitres of perspiration; trapped inside a sealed shell, that moisture migrates to the mid layer and cuts its loft. The fix is discipline in the first fifteen minutes: open pit zips on the climb, ride the lift with the collar down, and close everything only for the descent. On multi-day trips, rotate base layers so one dries overnight against your back, and never sleep in the layer you skied in. Mountain guides who work in cold environments treat active venting as a technical skill, not a minor convenience. Expert outdoor checklists place a dry spare base layer above a spare jacket, because the layer next to your skin dictates thermal comfort far more than the outer shell. Mastering your personal microclimate ensures steady warmth throughout the day without unexpected moisture buildup.